Schedule a Plumber This Monday to Get 50$ OFF
Schedule a Plumber This Monday to Get 50$ OFF

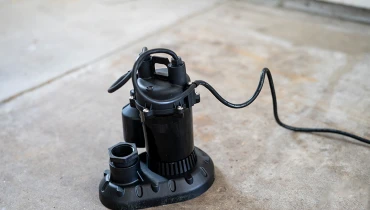
A sump pump is a homeowner's first line of defense against basement flooding, and having a backup sump pump can provide additional peace of mind. While many homeowners rely on professional plumbers and plumbing services for sump pump installation, installing a backup sump pump is a manageable DIY project for those with some plumbing skills.
Sump pumps are essential for homes with basements or crawl spaces, as they help prevent water damage by removing excess groundwater. However, power outages, pump failures, or clogs can compromise the effectiveness of your primary sump pump. A backup sump pump serves as a failsafe, ensuring continuous water removal even when the primary pump fails.
Before beginning the installation, gather the necessary tools and materials:
Safety First: Always start by ensuring your safety. Disconnect the power supply to the primary sump pump to avoid any electrical accidents.
Choose the Backup System: Decide between a battery-powered or water-powered backup system. Battery backups are more common and provide reliable performance during power outages. Water-powered backups use your home's water supply to pump water from the sump pit.
Select the Location: Identify a suitable location for the backup sump pump. It should be near the primary pump but positioned slightly higher to allow proper drainage. Ensure the discharge pipe runs away from the house.
Assemble the Backup Pump: Follow the manufacturer's instructions to assemble the backup sump pump. This typically involves attaching the float switch, impeller, and check valve.
Prepare the Discharge Pipe: If your backup pump uses a different discharge pipe than the primary pump, prepare the PVC pipe and fittings. Cut the pipe to the required length using a hacksaw and dry-fit the components to ensure a proper fit.
Install the Check Valve: Position the check valve in the discharge pipe. Ensure the arrow on the valve points away from the backup pump. Secure it in place using hose clamps or pipe tape.
Connect the Backup Pump: Attach the backup pump to the discharge pipe using pipe fittings and secure it with PVC cement. Use channel locks to tighten the connections.
Install the Float Switch: Position the float switch at the desired activation level. Typically, it should be higher than the primary pump's switch. Secure it according to the manufacturer's instructions.
Connect Power: If using a battery backup, connect the battery according to the manufacturer's instructions. Ensure the battery is fully charged before testing the system. Water-powered backups do not require a battery but need a reliable water supply.
Test the System: Fill the sump pit with water to activate the backup pump. Verify that it operates correctly and pumps water away from the pit. If using a battery backup, simulate a power outage to ensure the system switches seamlessly.
Installing a backup sump pump is a wise investment in safeguarding your home from potential water damage. While it's a task that can be accomplished by homeowners with some plumbing skills, if you're unsure about any step or face difficulties during installation, it's advisable to consult a professional plumber or plumbing service such as Mr. Rooter Plumbing. With a properly installed backup sump pump, you can rest assured that your basement will stay dry, even in the face of power outages or primary pump failures.
A peaceful home is built on small comforts—soft lighting, cozy spaces, and plumbing that works quietly in the background. When a faucet starts dripping, squealing, or banging, it quickly becomes…
A clogged drain may seem like a minor annoyance at first, but ignoring it can lead to much bigger issues inside your home. Water that drains slowly is often a…
You expect clean and clear water when you open your home’s faucets and shower heads. When it’s not, you know that you have a hidden water line problem on your…