Schedule a Plumber This Saturday to Get 50$ OFF
Schedule a Plumber This Saturday to Get 50$ OFF

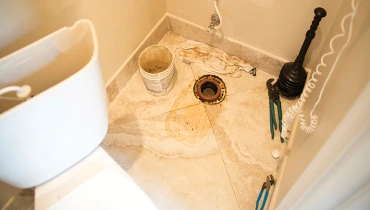
The toilet flange, often referred to as the closet flange, is a crucial component of your bathroom plumbing system. It connects the toilet to the waste pipe, ensuring a watertight seal and stability. Whether you're looking to replace a damaged flange or install a new one during a toilet installation or repair project, this article will guide you through the process. While many homeowners prefer to hire a plumbing service for this job, installing a toilet flange yourself is a manageable DIY project with the right tools and knowledge.
Before starting the installation, gather the following tools and materials:
Installing a toilet flange is an essential part of toilet repair or installation. While many homeowners opt for the expertise of a plumber or a plumbing service, those with basic plumbing skills can successfully tackle this project as a DIY endeavor. If you feel like you will need professional assistance, however, feel free to call Mr. Rooter Plumbing. A properly installed toilet flange ensures a watertight connection between the toilet and the waste pipe, preventing leaks and ensuring the toilet's stability.
If you’re a homeowner who has dealt with clogs or other plumbing issues or simply eager to maintain your plumbing system regularly, you might’ve heard of a technique called sewer…
In addition to being a crucial component of every home's plumbing system, sewer lines are also frequently disregarded because they are out of sight. Nonetheless, they shouldn’t’ be out of…
When to Get a Drain Replacement Have you ever considered what happens to the water after using it? Water gets drained through our drains, but what happens…